Upright Metallographic Microscope: The "Insightful Eye" in Materials Science Research
In fields such as materials science, metallurgy, and mechanical manufacturing, understanding the internal structure, defects, phase composition, and their relationship with the properties of a material is impossible with the naked eye. Here, the Upright Metallographic Microscope becomes an indispensable key tool. It acts as the "insightful eye" for materials scientists, revealing the microcosm of opaque materials like metals, alloys, and ceramics after meticulous preparation.
What is an Upright Metallographic Microscope?
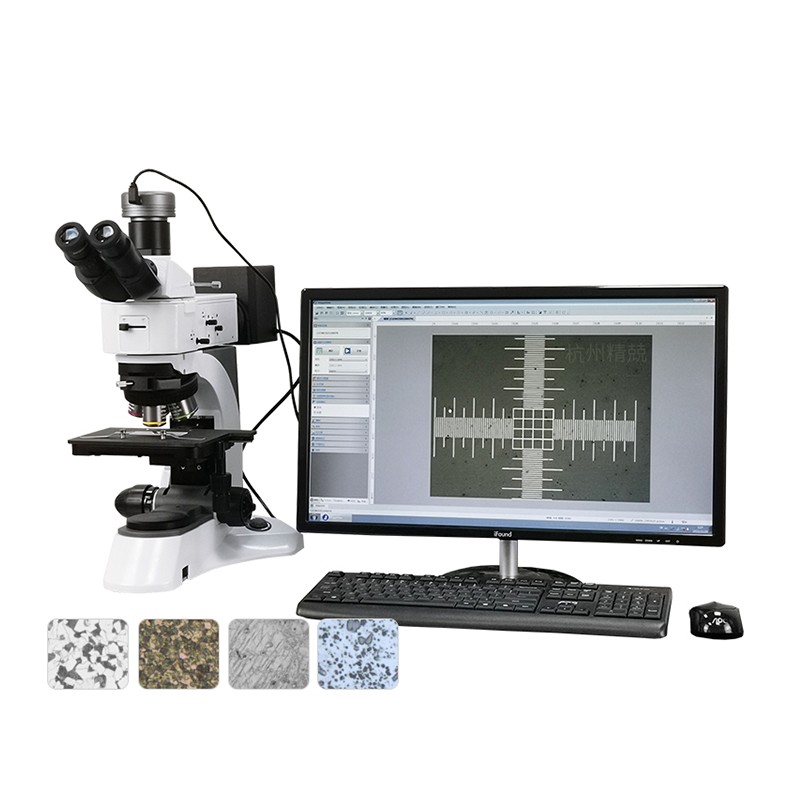
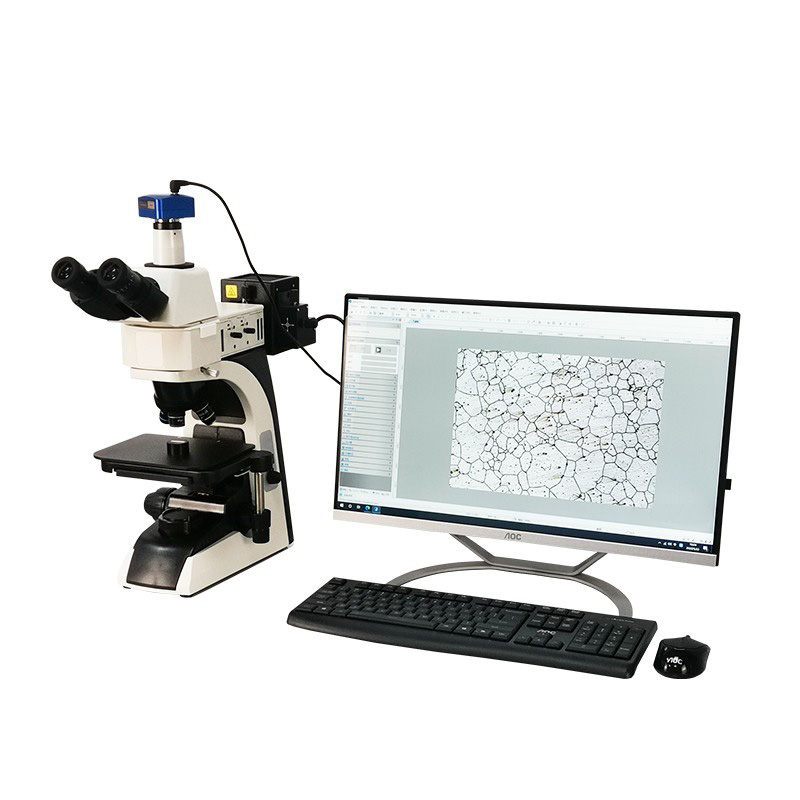
An Upright Metallographic Microscope, as the name suggests, features a typical upright optical path design: the objective lens is located above the sample, and the illumination system is below it. The observed sample must be a metallographic specimen prepared through a series of processes like cutting, mounting, grinding, polishing, and etching. Its core principle involves using vertical incident illumination light to hit the flat surface of the specimen. Differences in the reflection of light by various phases and grain boundaries within the material create clear contrast between light and dark in the image, thereby revealing the material's microstructure.
Key Features and Core Applications
Based on information from Jingjingtest, a typical upright metallographic microscope possesses the following characteristics and wide range of applications:
Main Features:
- Exceptional Image Quality: Utilizes an infinity-corrected optical system to ensure flat, high-contrast, and high-resolution clear images across the entire field of view.
- Stable Mechanical Structure: Robust and stable body design effectively resists external vibrations, ensuring observational and measurement accuracy.
- User-Friendly Operation: Ergonomic design, such as low-position coarse and fine focus knobs and stage handles, reduces fatigue during prolonged use.
- Powerful Expandability: Easily connects to high-resolution digital cameras for image capture, measurement, and analysis, meeting the digital needs of modern laboratories.
- Multiple Observation Modes: Typically supports Brightfield (BF), Darkfield (DF), Polarizing Light (POL), and other observation modes to suit the analysis requirements of different materials.
Core Application Areas:
- Metal Material Research: Observing grain size, phase composition, non-metallic inclusions in cast iron, steel, non-ferrous metals, etc.
- Heat Treatment Process Evaluation: Analyzing microstructural transformations after processes like quenching, tempering, and annealing, such as martensite, bainite, pearlite.
- Failure Analysis: Tracing the root causes of component failures like fracture, wear, and corrosion.
- Welding Quality Inspection: Analyzing the microstructure of weld zones to assess welding quality.
- Geology and Mineralogy: Used for structural analysis of ores and minerals.
Key Parameter Analysis (Using Jingjingtest Product as an Example)
To give you a more intuitive understanding of its technical specifications, we have compiled the following table of core parameters based on the reference website content:
| Parameter Category |
Specific Configuration and Description |
| Optical System |
Infinity-corrected chromatic aberration-free optical system, providing high clarity and contrast. |
| Eyepiece |
High-eye-point widefield eyepiece with a field of view diameter up to 22mm, reducing observation fatigue. |
| Objective Lens |
Equipped with long working distance plan achromatic objectives (e.g., 5X, 10X, 20X, 50X), ensuring flat, chromatic aberration-free imaging. |
| Total Magnification |
Typically ranges from 50X to 1000X, meeting the vast majority of metallographic analysis needs. |
| Stage |
Large mechanical stage (e.g., size 180mm x 150mm) with a large moving range (e.g., 30mm x 30mm), facilitating quick sample positioning. |
| Focusing System |
Coaxial coarse and fine focusing mechanism with a limit device, offering high precision and safe operation. |
| Illumination System |
Epi-illumination Köhler system, LED cold light source, adjustable brightness, long lifespan, low heat generation. |
| Observation Mode |
Brightfield (BF) as standard, expandable to Darkfield (DF), Polarized Light (POL), etc. |
| Camera Port |
Standard C-Mount interface for easy connection of digital cameras for image capture and analysis. |
How to Choose the Right Upright Metallographic Microscope?
When selecting an Upright Metallographic Microscope, in addition to referring to the parameters in the table above, you should also consider the following points:
- Research Needs: Clearly define the materials you primarily observe and the required resolution level. Routine quality inspection may not require the highest-end objectives, whereas cutting-edge research might need high-magnification oil immersion objectives (e.g., 100X).
- Objective Lens Quality: The objective lens is the heart of the microscope. Plan achromatic objectives effectively eliminate field curvature and chromatic aberration, forming the foundation for image quality.
- Digital Capability: In today's era, choosing a microscope that easily connects to HD cameras and is compatible with professional metallographic analysis software can significantly improve work efficiency.
- Operational Comfort: Stability and ergonomic design directly impact the experience of long-term work and the accuracy of results.
- Brand and Service: Opting for a brand like Hangzhou Jingjing Testing Instrument Co., Ltd., which can provide reliable technical support and after-sales service, is crucial for the long-term stable operation of the equipment.
About Hangzhou Jingjing Testing Instrument Co., Ltd.
Hangzhou Jingjing Testing Instrument Co., Ltd. is a comprehensive enterprise specializing in the production, R&D, sales, maintenance, and metrology management of hardness testers, tensile testing machines, metallographic microscopes, and metallographic sample preparation equipment. The company boasts a team of renowned engineers and service professionals within the domestic industry, who have participated in technical development and collaborative projects with multiple well-known instrument manufacturers in China. This extensive expertise ensures that their instruments, including the Upright Metallographic Microscopes, are designed and built to high standards of reliability and performance, supporting a wide range of industrial and research applications.
Conclusion
In summary, the Upright Metallographic Microscope is a fundamental tool for modern industrial development and materials science research. With its stable structure, excellent optical performance, and powerful functionality, it helps researchers and engineers uncover the microscopic secrets of materials, providing solid technical support for product quality control, new material development, and industrial failure analysis. Investing in a reliable and properly configured Upright Metallographic Microscope is a crucial step in enhancing material analysis capabilities.


 English
  Español
  Deutsch


