
 English
  Español
  Deutsch
Content
- 1 The Critical Role of Consumables in Metallographic Analysis
- 2 Navigating the Consumable Selection Landscape: Five Key Considerations
- 3
- 4 Building a Standard-Compliant Preparation Protocol
The Critical Role of Consumables in Metallographic Analysis
Metallographic analysis serves as the foundational methodology for understanding the internal structure of materials, providing invaluable insights into their properties, performance, and suitability for specific applications. The accuracy and reliability of this analysis are not solely dependent on the skill of the technician or the sophistication of the microscope; they are profoundly influenced by the consumables used at every preparation stage. From initial sectioning to final polishing and etching, each step requires precise selection of abrasives, lubricants, mounting media, and cleaning agents. The interplay between the material being examined and the consumables applied dictates the quality of the resulting specimen surface. A flawless, artifact-free surface is paramount for revealing true microstructural features such as grain boundaries, phases, inclusions, and any defects. Incorrect consumable selection can induce deformation, pull-out, scratching, or improper edge retention, leading to misinterpretation of the material's characteristics. Therefore, a systematic approach to choosing the right consumables is not a mere procedural detail but a critical scientific decision that directly impacts data integrity and compliance with international testing standards like ASTM E3, ISO 17025, and various material-specific guidelines.
Selecting the optimal metallographic consumable is a multi-faceted process that extends beyond simply matching a product to a material name. It requires a deep understanding of the material's inherent properties, the specific information sought from the analysis, and the rigorous requirements of the governing testing protocol. To navigate this complex landscape effectively, one must consider several interconnected factors. These include the material's hardness, ductility, and composition, which dictate its response to cutting and abrasion. The analysis objectives—whether seeking to examine inclusion content, measure coating thickness, or evaluate heat-affected zones—demand different levels of surface perfection. Furthermore, the entire preparation workflow must be considered as an integrated system, where the output of one step is the input for the next. The following sections will delve into five specific, high-impact areas where targeted consumable selection can drastically improve results. By focusing on these targeted queries, such as metallographic abrasive grit size for hardened steel or best polishing cloth for aluminum alloys, practitioners can develop a more nuanced and effective preparation strategy tailored to their unique challenges.
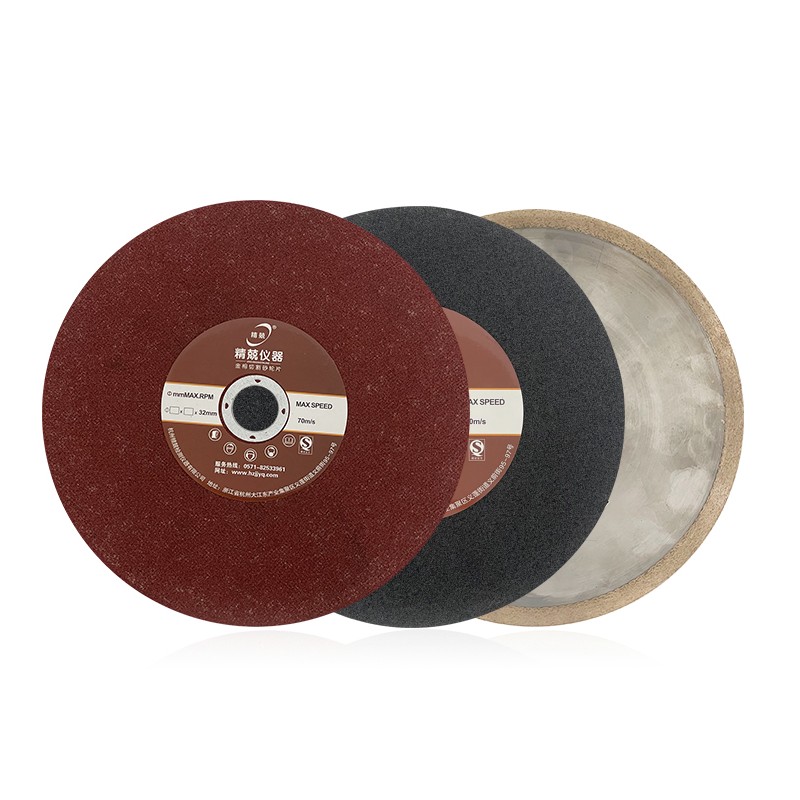
1. Sectioning and Cutting: The Foundation of a Good Sample
The initial sectioning operation is arguably the most critical step in metallographic preparation, as it establishes the baseline condition of the sample. A poorly executed cut can introduce deep subsurface deformation, thermal alteration, or microcracks that may be impossible to remove in subsequent steps, compromising the entire analysis. The primary goal is to obtain a representative sample with minimal damage. The selection of the cutting abrasive—typically in the form of a bonded cutting wheel or an abrasive slurry for precision saws—is paramount. Key parameters include the abrasive mineral type, its grit size, the bond hardness, and the use of appropriate coolants.
Matching the Abrasive to Material Hardness and Brittleness
For hard and brittle materials like ceramics, cemented carbides, or hardened tool steels, a friable abrasive that fractures to reveal new sharp cutting points is essential. Silicon carbide (SiC) is a common choice for its sharp, hard particles. The cutting must be performed with a gentle, controlled feed rate and ample coolant to prevent thermal shock and cracking. Conversely, ductile materials like pure aluminum, copper, or soft austenitic stainless steels are prone to smearing, galling, and generating long, troublesome chips. For these, a tougher abrasive with a stronger bond is needed to maintain grit retention and ensure a clean cut. Aluminum oxide or specialized abrasive blends are often employed. The coolant here also acts as a lubricant to reduce loading and adhesion of the soft material to the wheel. A common search in this domain is for the right cutting fluid for titanium metallography, as titanium is notorious for its poor thermal conductivity and reactivity. A heavy-duty, chlorinated or sulfurized cutting fluid is typically recommended to maximize heat transfer, reduce the risk of ignition, and minimize work hardening during the sectioning of titanium and its alloys.
To illustrate the contrast in approach, consider the following table which outlines key consumable considerations for different material families during sectioning:
| Material Type | Key Challenge | Recommended Abrasive Type | Coolant/Lubricant Focus | Cutting Parameter Emphasis |
|---|---|---|---|---|
| Hardened Steels, Cast Iron | Rapid wheel wear, heat generation | Silicon Carbide (Aluminum Oxide for softer grades) | High cooling capacity, rust inhibitors | Moderate feed rate, constant coolant flow |
| Aluminum & Magnesium Alloys | Loading of wheel, smearing, chip adhesion | Aluminum Oxide, specialized soft-material blades | Lubricity to prevent loading, corrosion protection | Light feed pressure, sharp blade |
| Titanium & Nickel Alloys | Work hardening, heat concentration, reactivity | Reinforced Aluminum Oxide or SiC | Heavy-duty, extreme pressure (EP) fluids | Slow, steady feed; abundant coolant |
| Ceramics & Composites | Brittle fracture, edge chipping, delamination | Diamond-impregnated blade (for precision saws) | Light oil or water-based coolant for heat dissipation | Very low feed pressure, high blade speed |
2. Mounting: Ensuring Stability and Edge Integrity
Following sectioning, many samples require mounting to facilitate handling during the grinding and polishing stages, especially when dealing with small, irregularly shaped, or fragile specimens. The mounting process encapsulates the sample in a solid medium, protecting its edges and providing a uniform, ergonomic shape for automated preparation. The choice between compression (hot) mounting and cold mounting resins is a fundamental decision with significant implications for the sample. Compression mounting uses heat and pressure to form a mold around the sample with thermosetting plastics like phenolic or epoxy. This method produces mounts with excellent hardness, edge retention, and low shrinkage. However, the heat and pressure involved can damage heat-sensitive or pressure-sensitive materials, such as certain polymers, coated samples, or porous structures. For these, cold mounting using epoxy, acrylic, or polyester resins that cure at room temperature is mandatory. A frequent challenge arises with porous or cracked samples, such as thermal spray coatings or fatigued metals, where air and fluids become trapped. This is where knowledge of vacuum impregnation techniques for porous metallographic samples becomes crucial. Vacuum impregnation involves placing the sample in resin under a vacuum to evacuate air from pores and cracks before allowing the resin to infiltrate, ensuring a void-free mount that provides true support and allows for clear observation of porosity itself.
Selecting a Mounting Media for Specific Analysis Needs
The properties of the mounting resin must align with the analytical goals. For routine examination of steel or cast iron, a hard, scratch-resistant phenolic resin is often sufficient. If the sample requires subsequent analysis by electron microprobe or requires high electrical conductivity, a conductive mounting media filled with copper or carbon may be necessary. For materials where edge retention is absolutely critical, such as evaluating thin coatings or surface treatments, a filled epoxy resin with minimal shrinkage is the gold standard. The process of selecting the right resin involves weighing factors such as:
- Cure Shrinkage: High shrinkage can pull away from the sample, creating gaps that trap abrasive and etchant, or worse, damage delicate edges. Epoxies generally have lower shrinkage than acrylics.
- Hardness and Abrasion Resistance: The mount should be similar in hardness to the sample to ensure uniform material removal during grinding/polishing. A mount that is too soft will wear faster, causing the sample to protrude; a mount that is too hard can leave the sample recessed.
- Chemical Resistance: The resin must withstand prolonged exposure to polishing lubricants, cleaning solvents, and etching reagents without swelling, degrading, or dissolving.
- Clarity: For documentation and easy sample identification, a transparent mount is advantageous. Epoxies offer excellent clarity, while phenolics are opaque.
3. The Grinding and Polishing Sequence: A Systematic Progression
Grinding and polishing constitute the core of planar preparation, designed to progressively remove the damaged layer from sectioning and produce a mirror-like, deformation-free surface. This is not a single step but a carefully orchestrated sequence where each stage uses finer abrasives to eliminate the scratches introduced by the previous stage. The consumables here—abrasive discs, grinding stones, polishing cloths, and diamond/alumina suspensions—must be selected as a coherent system. A common and critical question in this phase revolves around the metallographic abrasive grit size for hardened steel. Starting with too coarse a grit on a hard steel will waste time and consumables, while starting too fine will never remove the deep deformation. A typical sequence for hardened steel might begin with a coarse silicon carbide paper (e.g., 120 or 180 grit) to planarize the surface, followed by a progression through finer SiC papers (320, 600, 1200 grit) to remove the previous scratches. The transition to polishing often starts with a coarse diamond suspension (e.g., 9µm or 6µm) on a hard, non-compressible cloth, followed by finer diamond (3µm, 1µm) on a softer cloth, and potentially a final colloidal silica step on a chemomechanical cloth for the ultimate scratch-free finish.
Polishing Cloths: The Unsung Heroes of Surface Finish
The polishing cloth is far more than just a substrate to hold abrasive; its nap, compressibility, and texture govern the cutting rate, scratch pattern, and relief control. The search for the best polishing cloth for aluminum alloys highlights this importance. Aluminum is soft and prone to scratching, smearing, and relief between hard intermetallic particles and the soft matrix. A napless, synthetic silk cloth used with a lubricated diamond suspension provides a good balance of cutting and fine scratch control for the initial diamond polishing steps. For the final step, a low-nap, porous cloth used with a colloidal silica suspension often yields excellent results, as the silica's chemomechanical action gently polishes the aluminum matrix while maintaining high edge retention and minimizing relief. In contrast, for hardened steel, a durable, woven cloth with little to no nap is preferred for diamond polishing to maintain a flat surface, while a soft, flocked cloth might be used for a final oxide polishing step.
The differences in consumable strategy for two disparate materials are stark, as shown in the table below:
| Material: Hardened Steel (60 HRC) | Stage | Recommended Abrasive | Recommended Cloth/ Surface | Objective |
|---|---|---|---|---|
| Grinding | Planar Grinding | SiC Paper, 120-180 grit | Rigid grinding disc | Remove cutting damage, achieve flatness |
| Fine Grinding | SiC Paper, 320 to 1200 grit | Rigid grinding disc | Remove previous scratches, minimize deformation | |
| Polishing | Coarse Polish | Diamond Suspension, 9µm | Hard woven synthetic cloth | Remove fine grinding scratches |
| Final Polish | Colloidal Silica, 0.04µm | Soft synthetic nap cloth | Produce scratch-free, reflective surface | |
| Material: Wrought Aluminum Alloy (e.g., 6061) | Stage | Recommended Abrasive | Recommended Cloth/ Surface | Objective |
| Grinding | Planar/Fine Grinding | SiC Paper, 320 to 1200 grit | Rigid grinding disc | Remove damage with minimal deformation |
| Polishing | Diamond Polish | Diamond Suspension, 3µm | Napless silk cloth | Remove scratches without inducing relief |
| Final Polish | Colloidal Silica | Low-nap porous cloth | Chemomechanical polish, minimize smearing |
4. Etching and Revealing Microstructure
Once a pristine surface is achieved, the true microstructure must be revealed through etching. Etching selectively attacks the surface based on crystallographic orientation, phase composition, or chemical heterogeneity, creating topographic or reflectivity contrasts visible under the microscope. The choice of etchant is as material-specific as the preparation steps. General-purpose etchants like Nital (nitric acid in alcohol) for ferrous metals or Keller's reagent for aluminum are common, but specialized materials demand specialized solutions. A modern and critical area of focus is the development and use of environmentally friendly etchants for metallographic preparation. Traditional etchants often contain hazardous components like concentrated acids (hydrofluoric, nitric, picric), potent alkalies, or toxic salts. Safety and environmental regulations are driving the adoption of safer alternatives. These may include ready-to-use commercial formulations with reduced hazard profiles, electrochemical etching methods that use less reagent, or entirely new chemical mixtures designed to be less toxic, less corrosive, and easier to dispose of while maintaining equivalent or superior etching quality. For example, some new etchants for stainless steel use oxalic acid or electrolytic methods in place of more dangerous mixed acids.
Application Methods and Their Impact
The method of etchant application also influences the result. Swabbing provides good control and is useful for progressive etching. Immersion is consistent and hands-off but uses more reagent. Electrolytic etching, essential for many passive metals like titanium and certain stainless steels, offers exceptional control and uniformity by using the sample as an anode in an electrochemical cell. The key is to follow standardized procedures (like those in ASTM E407) for the specific material to ensure reproducible results that can be compared against accepted micrographs and specifications.
5. Cleaning and Drying: The Final, Critical Step
After each preparation step, especially after polishing and etching, thorough cleaning is non-negotiable. Residual abrasive particles, polishing lubricant, or etchant left on the sample surface will contaminate the next step's consumables, cause scratching, lead to staining, or create misleading artifacts in the microstructure. Effective cleaning is a multi-stage process. The first rinse often uses a solvent like ethanol or a specialized cleaning solution to remove oily lubricants and organic residues. This is typically followed by ultrasonic cleaning in a bath of clean solvent or detergent solution, which uses cavitation bubbles to dislodge particles from microscopic surface pores and scratches. Finally, rinsing with a volatile, residue-free solvent like high-purity alcohol or distilled water, followed by careful drying with a stream of clean, dry, compressed air or inert gas, completes the process. Neglecting this step can completely undo the meticulous work of the previous hours, emphasizing that the consumables used for cleaning—solvents, detergents, ultrasonic baths—are as vital as those used for material removal.
Building a Standard-Compliant Preparation Protocol
Ultimately, the selection of every consumable must be validated against the relevant testing standard. Standards such as ASTM E3, ISO 17025 (for lab competence), and countless material-specific standards (e.g., ASTM E112 for grain size, ASTM E384 for hardness) provide frameworks for acceptable preparation methods. They often specify or imply the type of consumables required to achieve a result deemed fit for purpose. For instance, a standard might specify that a sample must be etched with a certain reagent to reveal a particular phase, which in turn dictates that the preceding polishing must not obscure that phase through relief or smearing. Therefore, the consumable selection process is not open-ended; it is a disciplined exercise in meeting predefined criteria for repeatability, accuracy, and comparability. By methodically addressing each stage—from selecting the right cutting fluid for titanium metallography to implementing vacuum impregnation techniques for porous metallographic samples—and aligning choices with both material science principles and standard requirements, metallographers can ensure their results are both scientifically valid and globally recognized.