
 English
  Español
  Deutsch
In the realm of material science, quality control, and research & development, accurately measuring a material's resistance to deformation is paramount. Among the various hardness testing methods, the digital microhardness tester stands out for its precision, versatility, and advanced capabilities. This sophisticated instrument is indispensable for evaluating the hardness of small, thin, or complex components where traditional methods fall short. As a leader in the field of precision testing equipment, Hangzhou Jingjing Testing Instrument Co., Ltd. leverages its extensive engineering expertise to provide comprehensive solutions, ensuring clients receive not only high-quality instruments but also unparalleled technical support. This guide delves deep into the world of digital microhardness testing, offering valuable insights to help you understand its applications and make an informed selection.
Content
- 1 What is a Digital Microhardness Tester?
- 2 Key Applications and Industries Served
- 3 Advantages of Digital Microhardness Testers Over Traditional Models
- 4 Understanding Different Microhardness Scales: Vickers vs. Knoop
- 5 How to Choose the Right Digital Microhardness Tester: A Buyer's Guide
- 6 Optimizing Testing Accuracy: Best Practices and Common Challenges
- 7 The Role of a Trusted Partner in Your Testing Success
- 8
- 9 Frequently Asked Questions (FAQs)
- 9.1 1. What is the main difference between a microhardness tester and a regular hardness tester?
- 9.2 2. How often should I calibrate my digital microhardness tester?
- 9.3 3. Can I test non-metallic materials with a digital microhardness tester?
- 9.4 4. What does "automatic measurement" mean in the context of these testers?
- 9.5 5. Why is sample preparation so critical for microhardness testing?
- 10 References
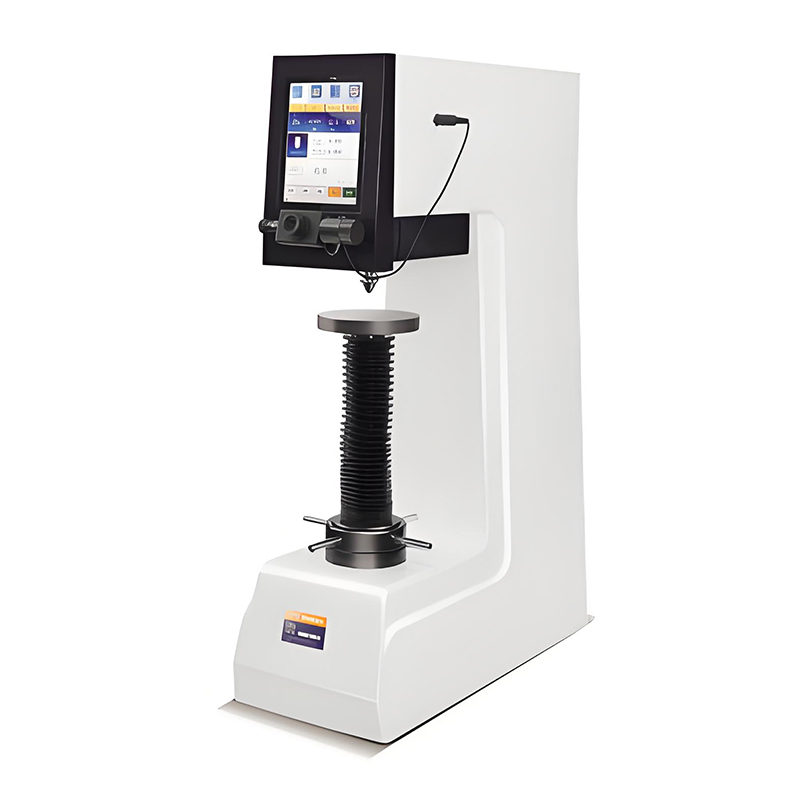
What is a Digital Microhardness Tester?
A digital microhardness tester is an advanced instrument designed to measure hardness by pressing a diamond indenter of a specific geometry into the surface of a material under a very light load, typically ranging from 10 grams-force (gf) to 1 kilogram-force (kgf). The key distinction lies in its digital integration, which automates the measurement of the resulting indentation's diagonal lengths and instantly calculates the hardness value (HV or HK) with high accuracy and repeatability.
Core Components and Working Principle
Main Components
- Digital Control System: The brain of the tester, managing load application, measurement, and data calculation.
- Precision Indenter: Typically a Vickers diamond pyramid or a Knoop diamond indenter.
- High-Resolution Optical System: Comprising a microscope and a digital camera for capturing the indentation image.
- Motorized Test Head: For automatic and precise application and removal of the test force.
- Software Interface: For controlling the test, analyzing images, and managing data.
How It Works
The process is automated: the sample is positioned, the predefined test force is applied and held for a specific dwell time, the force is removed, and the optical system automatically measures the indentation diagonals. The software then computes the hardness number based on the applied force and the indentation area.
Key Applications and Industries Served
The precision of the digital microhardness tester makes it vital across numerous sectors. Its ability to perform microhardness testing on thin coatings is particularly crucial for the surface engineering and tooling industries, ensuring coating adhesion and performance.
- Metallurgy & Materials Science: Studying phase transformations, work-hardening effects, and heat-affected zones in welds.
- Electronics & Semiconductors: Testing the hardness of solder balls, thin conductive layers, and silicon wafers.
- Aerospace & Automotive: Evaluating case-hardened surfaces, turbine blade coatings, and other critical high-strength, lightweight components.
- Medical Device Manufacturing: Assessing the hardness of bone implants, surgical tools, and biocompatible coatings.
- Academic Research: Fundamental studies on material properties at the micro-scale.
Advantages of Digital Microhardness Testers Over Traditional Models
The evolution from manual, analog testers to fully digital systems has brought transformative benefits. While analog testers rely on manual visual measurement through an eyepiece, digital testers automate the entire process. This fundamental shift reduces human error and significantly improves throughput. For instance, how to choose a digital microhardness tester often centers on these advantages. The key differences are best illustrated through a direct comparison.
The primary advantage of digital models is the elimination of operator influence on measurement. Manual measurement of indentation diagonals under a microscope is subjective and can lead to inconsistent results, especially with inexperienced users. Digital systems, however, use image analysis algorithms to measure diagonals objectively and with sub-micron precision. This results in superior repeatability and reproducibility (R&R). Furthermore, digital testers offer enhanced data management capabilities. Test parameters, results, and even indentation images can be automatically saved, documented, and exported for reports or SPC (Statistical Process Control) analysis, a feature largely absent in traditional models. This automation directly addresses the need for automated microhardness measurement systems in modern industrial labs seeking efficiency and traceability.
| Feature | Traditional Analog Tester | Modern Digital Microhardness Tester |
|---|---|---|
| Measurement Method | Manual via eyepiece graticule | Automatic via digital image analysis |
| Operator Dependency | High (subject to human error) | Very Low (objective, consistent) |
| Data Recording | Manual logging | Automatic storage & export |
| Test Speed | Slow | Fast and programmable |
| Result Traceability | Limited | High (images and data linked) |
Understanding Different Microhardness Scales: Vickers vs. Knoop
Two primary scales are used in microhardness testing: Vickers (HV) and Knoop (HK). The choice between them depends on the material and the test objective. A Vickers indenter is a symmetrical diamond pyramid, producing a square indentation. It is suitable for a wide range of materials and is less sensitive to surface preparation. In contrast, a Knoop indenter is an asymmetrical elongated pyramid, producing a rhombic indentation. It is ideal for brittle materials or for testing very thin layers, as it creates a shallower indentation for the same long diagonal length, minimizing the risk of cracking or substrate effect. For laboratories requiring flexibility, a Vickers and Knoop dual indenter tester is the optimal choice, allowing seamless switching between the two methods on the same unit.
| Aspect | Vickers Microhardness (HV) | Knoop Microhardness (HK) |
|---|---|---|
| Indenter Shape | Square-based diamond pyramid (136° apex angle) | Elongated diamond pyramid (172.5° long edge, 130° short edge) |
| Indentation Shape | Square | Elongated rhombus |
| Best For | Most materials, general-purpose testing | Brittle materials, thin coatings, anisotropic materials |
| Indentation Depth | Deeper for a given load | Shallower for a given long diagonal length |
How to Choose the Right Digital Microhardness Tester: A Buyer's Guide
Selecting the ideal instrument requires careful consideration of your specific needs. Answering how to choose a digital microhardness tester involves evaluating several technical and operational factors.
1. Define Your Application and Test Standards
- Identify the typical materials, sample sizes, and hardness ranges.
- Determine the required hardness scales (HV, HK, or both).
- Ensure the tester complies with relevant international standards (e.g., ASTM E384, ISO 6507).
2. Evaluate Critical Technical Specifications
- Load Range: Ensure it covers your required forces (e.g., 10gf to 1kgf). A wider range offers more versatility.
- Measuring Accuracy & Repeatability: Look for specifications on diagonal measurement resolution and hardness value repeatability.
- Optical System: Higher magnification objectives (e.g., 40x, 100x) and camera resolution enable more precise measurement of tiny indentations.
3. Consider Automation and Software Features
The core of a modern system is its software. An automated microhardness measurement system should offer features like automatic stage movement, multi-point testing patterns, and batch processing. The software should also provide robust data analysis, statistical tools, and easy report generation. This is essential for achieving high throughput and reliable data management in a production environment [1].
4. Assess Usability and Support
- Consider the ergonomics and training requirements for operators.
- Prioritize suppliers with strong technical support, calibration services, and comprehensive after-sales service, such as the network provided by Hangzhou Jingjing Testing Instrument Co., Ltd.
Optimizing Testing Accuracy: Best Practices and Common Challenges
Even the most advanced digital microhardness tester requires proper operation to yield accurate results. Following best practices is non-negotiable for reliable data.
Sample Preparation is Paramount
- Mounting: Small or irregular samples must be properly mounted in resin to ensure stability during indentation.
- Grinding and Polishing: The test surface must be flat, smooth, and free of scratches or deformation. A mirror-like finish is ideal for clear indentation imaging [2].
- Cleaning: Remove all debris and residue from the surface before testing.
Calibration and Regular Verification
Regular calibration using certified reference blocks is essential to maintain traceability to national standards. This verifies the accuracy of both the applied force and the measuring system.
Troubleshooting Common Issues
- Indentation Not Clear: Often due to poor sample preparation, insufficient polishing, or incorrect lighting.
- Excessive Scatter in Results: Can be caused by material inhomogeneity, vibrations during testing, or an uncalibrated machine.
- Cracked Indentations: Common in brittle materials; consider using a Knoop indenter or reducing the test force.
For those dealing with advanced materials, mastering techniques for microhardness testing on thin coatings is critical. This requires precise control of test force to ensure the indentation depth is less than 10% of the coating thickness to avoid influence from the substrate [3].
The Role of a Trusted Partner in Your Testing Success
Investing in a digital microhardness tester is a significant decision that impacts quality assurance and research outcomes. Partnering with an experienced provider like Hangzhou Jingjing Testing Instrument Co., Ltd. offers distinct advantages. Our team of seasoned engineers provides end-to-end support, from pre-sales technical consulting to help you select the right model—be it a standard Vickers tester or a sophisticated Vickers and Knoop dual indenter tester—to comprehensive after-sales services including installation, training, and maintenance. Our commitment to "Better price for equal quality; better service for equal price" ensures you receive an optimal balance of performance, reliability, and value, backed by a nationwide support network.
Frequently Asked Questions (FAQs)
1. What is the main difference between a microhardness tester and a regular hardness tester?
The primary difference lies in the test force and application. Microhardness testers use very light loads (typically 10gf to 1kgf) and have a high-resolution optical system to measure small indentations, making them suitable for small parts, thin materials, or specific phases within a structure. Macro-hardness testers (like Rockwell or Brinell) use much higher forces (e.g., 1kgf to 3000kgf) for bulk material testing.
2. How often should I calibrate my digital microhardness tester?
Calibration frequency depends on usage, laboratory quality procedures, and accreditation requirements. It is generally recommended to perform an annual calibration using certified reference blocks. More frequent user verification (e.g., monthly or weekly) is advised for high-volume or critical testing applications to ensure ongoing accuracy.
3. Can I test non-metallic materials with a digital microhardness tester?
Yes, absolutely. Digital microhardness testers are extensively used for ceramics, glass, composites, polymers, and even certain biological materials. The Knoop scale is often preferred for very hard, brittle materials like ceramics due to its lower tendency to cause cracking.
4. What does "automatic measurement" mean in the context of these testers?
Automatic measurement refers to the tester's ability to locate the indentation's edges and measure the diagonal lengths without manual intervention from the operator. The software analyzes the digital image from the camera, applies edge-detection algorithms, and calculates the diagonals, thereby eliminating human bias and improving speed and repeatability.
5. Why is sample preparation so critical for microhardness testing?
Because the indentations are microscopic, any surface imperfection (scratches, pits, roughness, or deformed layers from cutting) can distort the indentation shape, making accurate diagonal measurement impossible. A properly prepared, flaw-free surface is essential to obtain the true hardness value of the material [2].
References
[1] Smith, J. & Lee, A. (2020). *Automation in Material Testing: Impacts on Data Integrity and Throughput*. Journal of Testing and Evaluation.
[2] Vander Voort, G. F. (2011). *Metallography: Principles and Practice*. ASM International.