

 English
 Español
 Deutsch

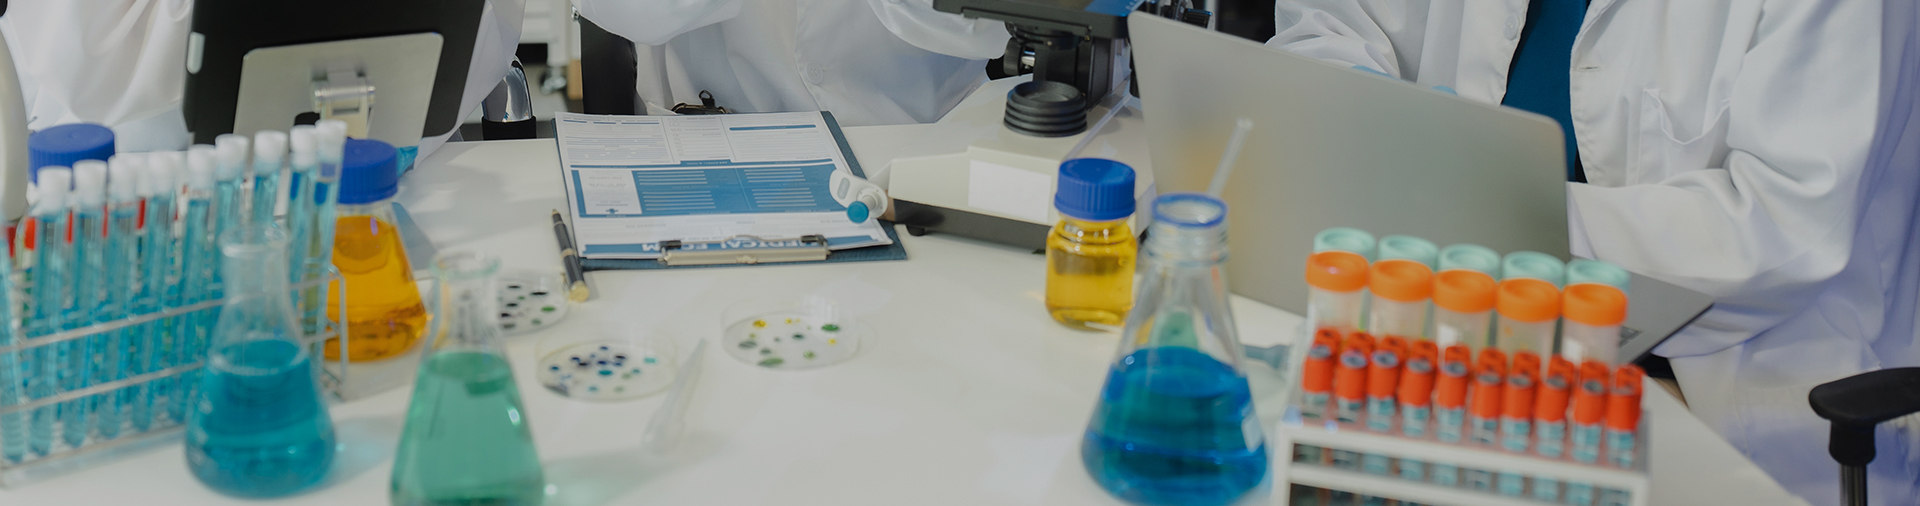
Setting up a new metallographic testing laboratory is a significant investment for any manufacturing enterprise, materials research group, or independent testing facility. Metallographic analysis is the primary method used to evaluate microstructure, verify heat treatment quality, identify material defects, and support failure investigations. A functional laboratory cannot be assembled by purchasing a microscope alone. Every sample preparation step, from cutting to final polishing, influences the accuracy of the structures you observe under the microscope, and the hardness data you record afterward.
This guide is designed as a practical checklist and budget planning tool. It covers all five stages of the metallographic workflow, defines which equipment is essential, and provides a realistic framework for estimating both initial capital expenses and ongoing operating costs.
Whether you are equipping a plant quality laboratory, a university teaching lab, or a commercial materials testing center, the information below will help you avoid the most common omissions and make procurement decisions that balance performance and cost.
Content
- 1 Understanding the Metallographic Testing Workflow
- 2 Essential Equipment Checklist by Workflow Stage
- 3 Budget Planning: Capital Equipment and Running Costs
- 4 Smart Selection Criteria for Long-Term Performance
- 5 Frequently Asked Questions
- 5.0.1 Q1: What is the minimum equipment needed to start a metallographic testing lab?
- 5.0.2 Q2: How much does it cost to set up a metallographic testing laboratory?
- 5.0.3 Q3: Should I choose an inverted or an upright metallographic microscope?
- 5.0.4 Q4: How long does metallographic sample preparation take?
Understanding the Metallographic Testing Workflow
Every metallographic sample must pass through a structured preparation workflow before its true microstructure can be observed and interpreted. Each stage removes the deformation and contamination introduced by the previous stage, progressively revealing a clean, artifact-free surface.
- Sectioning and cutting removes a representative specimen from the parent material with minimal heat-affected zone.
- Mounting / inlay encapsulates small, fragile, or irregular samples in a resin cylinder to make handling safe and edge retention reliable.
- Grinding and polishing flattens the surface and removes cutting damage through successively finer abrasives.
- Microscopic examination reveals grain structure, phases, inclusions, porosity, and other microstructural features.
- Hardness testing correlates mechanical response with the observed microstructure, especially for heat-treated or coated materials.
Understanding this workflow matters because it determines how many workstations and consumables you need. A lab that only performs occasional failure analysis has very different equipment requirements from a lab that supports daily production quality control.
Essential Equipment Checklist by Workflow Stage
1. Sectioning and Cutting Equipment
The cutting stage isolates a sample from the workpiece or raw material while minimizing thermal and mechanical damage. A metallographic cutting machine is defined by its abrasive cutting disc, coolant delivery system, and the stability of its worktable. The QG series is a dependable choice for general laboratory use, offering sufficient cutting capacity for common metal bar, plate, and component geometries.
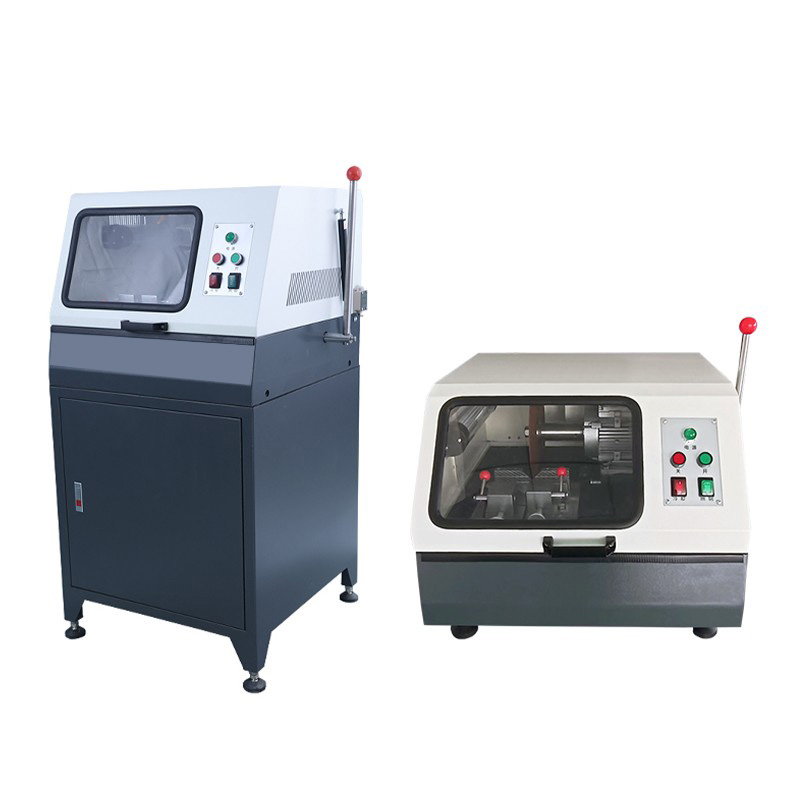 QG Series Metallographic Sample Cutting Machine for Laboratory UseThe QG series offers multiple cutting capacities and cooling systems for clean, burr-free metallurgical sample preparation. Its bench or stand configurations adapt to various lab spaces and cutting force needs.View Product →
Beyond the machine itself, budget for abrasive cutting discs in multiple diameters and grit grades, cutting coolant concentrate, and a clamping fixture for holding irregular parts. Laboratories working with thin sheet material or electronics components should also consider a precision plate cutting machine with fine feed control.
2. Mounting / Inlay Equipment
Once cut, many samples require mounting, also called inlay, to create a uniform handle and to protect edges during grinding and polishing. Hot mounting presses, such as automatic or semi-automatic inlay machines, apply heat and pressure to form a cylindrical resin mount around the specimen. A machine with water cooling, like the ZXQ-1 fully automatic mounting machine, protects temperature-sensitive materials from overheating.
For labs testing polymers, electronic assemblies, or brittle ceramics that cannot tolerate heat or pressure, cold mounting with epoxy or acrylic resin is an essential alternative. The consumables you need include mounting powder or resin, silicone rubber molds, release agents, and mounting clips for edge retention.
3. Grinding and Polishing Equipment
Grinding and polishing are the most labor-intensive steps of metallographic preparation and have the largest impact on final image quality. The basic machine is a rotary disk grinder-polisher with variable speed and water supply. For a more detailed review of preparation machines and consumables, see our complete guide to metallographic preprocessing equipment. Single-disk units such as the M1 or M2 pre-grinding machines are sufficient for low-volume work, while the PG series grinding and polishing machines offer multiple disks and independent speed control for higher throughput.
The recurring consumable list for this stage is substantial: silicon carbide waterproof abrasive paper in grits from 120 to 4000, polishing cloths, diamond polishing paste and suspension, alumina or silica polishing liquids, and lubricant. These materials represent the largest ongoing consumable expense in a metallographic lab, and their selection must be matched to the hardness and ductility of the alloys you examine.
4. Microscopic Examination Equipment
The metallographic microscope is the analytical center of the laboratory. For most ferrous and non-ferrous alloys, an inverted metallographic microscope is preferred because the sample is placed face-down on the stage, which naturally accommodates samples of different height without requiring a perfectly flat bottom surface. Digital inverted microscopes such as the ICX41M integrate a camera and measurement software, making it easy to capture images, measure grain size, and document microstructural findings for certification reports.
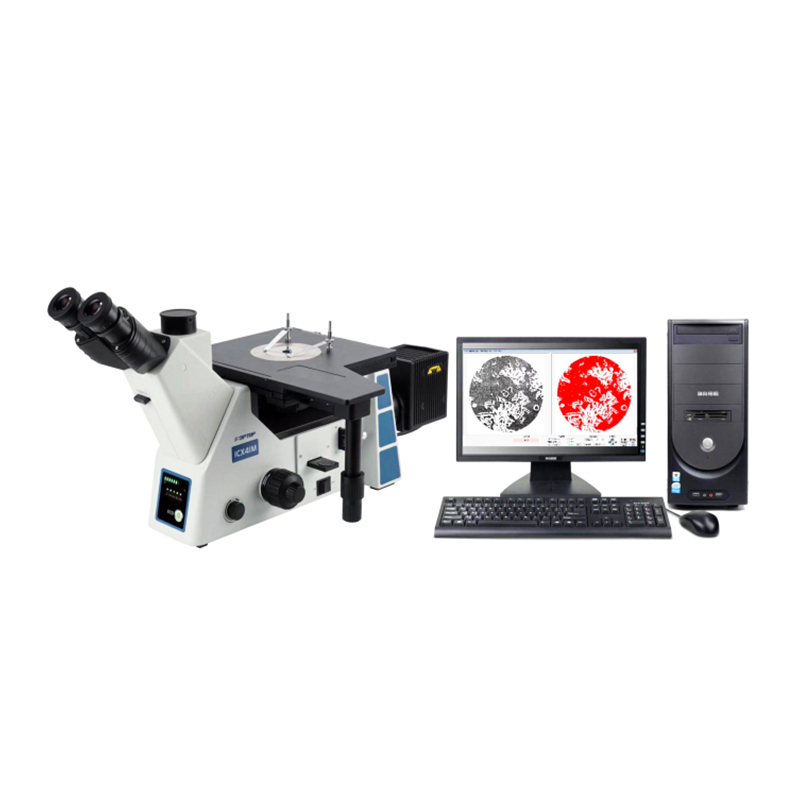 ICX41M Inverted Metallographic Microscope with Digital ImagingThe ICX41M provides ergonomic inverted observation with a large stage, 360° viewing tube, and ECO sensor. It supports grain size measurement and documentation, suited for material labs and quality inspection.View Product →
If your laboratory also works with thin sections, flat-mounted electronics, or coatings, add an upright metallographic microscope with reflected-light illumination. Research-level upright systems such as the ML9000 extend capabilities with objectives optimized for polarization, dark-field observation, and high-resolution imaging.
5. Hardness Testing Equipment
Hardness testing is the most direct mechanical correlation to microstructure, and it is almost always part of the scope of a metallographic laboratory. A Vickers hardness tester is the most flexible option because the indenter can be applied to small areas, individual phases, or thin layers. The HV-1000Z manual turret microhardness tester provides stable micro-indentation measurements and is well suited for a general-purpose metallographic lab.
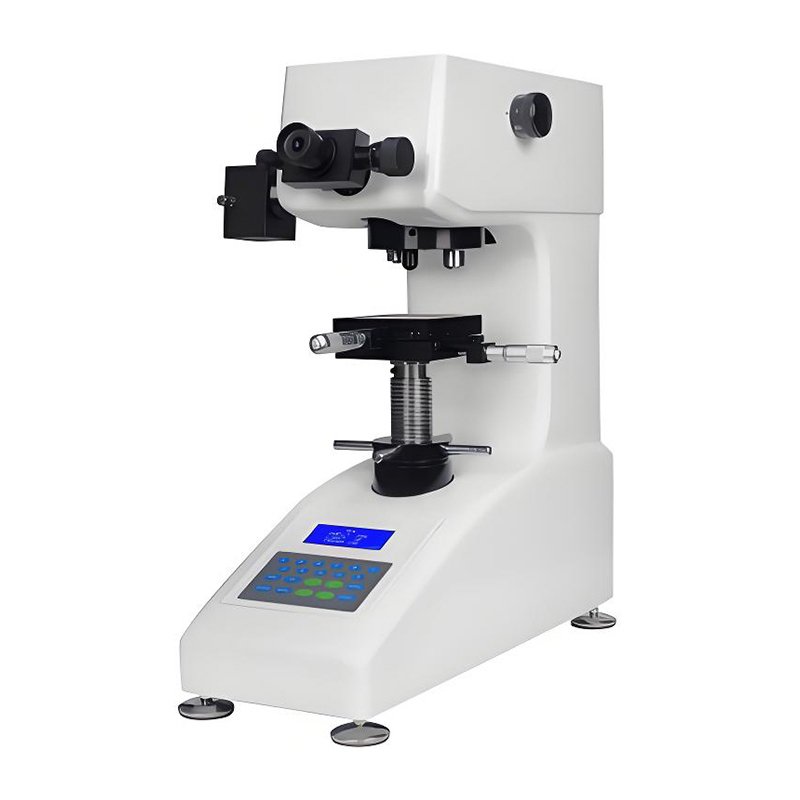 HV-1000Z Manual Turret Microhardness Tester with LCD DisplayThe HV-1000Z offers Vickers and Knoop scales, automatic turret switching, and precise micro-indentation measurement. Its cast aluminum body ensures stability for routine hardness testing of metals and ceramics.View Product →
Depending on the typical test load and material type, you may also need a Rockwell hardness tester for rapid production quality checks, or a Brinell hardness tester for coarse-grained castings and forgings. For maximum flexibility in a limited budget, a multifunction hardness tester that covers Brinell, Rockwell, and Vickers methods in one instrument can replace three separate machines.
Budget Planning: Capital Equipment and Running Costs
A reliable budget plan separates one-time capital investments from recurring operating expenses. The table below shows a typical allocation model for a mid-sized metallographic laboratory serving precision manufacturing or quality control functions. The percentages represent the share of the initial equipment budget and should be adjusted according to your testing volume and material mix.
| Budget Category | Share of Initial Budget | Typical Items |
|---|---|---|
| Cutting, mounting & grinding-polishing equipment | 25 - 30% | Cutting machines, inlay machines, grinders, polishers |
| Microscopes and imaging | 30 - 35% | Inverted / upright microscopes, digital cameras, analysis software |
| Hardness testers | 15 - 20% | Vickers, Rockwell, Brinell, portable hardness testers |
| Consumables and accessories | 10 - 15% | Cutting discs, abrasive paper, polishing cloths, suspensions, mounting resins |
| Installation, calibration & training | 5 - 10% | Site preparation, calibration certificates, operator training |
Basic Lab
USD 30K - 50K
Manual cutting and polishing, entry-level inverted microscope, bench Rockwell or portable Leeb hardness tester, essential consumables.
Mid-Range Lab
USD 60K - 100K
Automatic cutting machine, mounting press, two-disk grinder-polisher, digital inverted microscope with camera, Vickers microhardness tester.
Research-Level Lab
USD 120K - 200K
Automated preparation line, research-grade upright and inverted microscopes, multifunction hardness tester, large consumables package and extended training.
Hidden Costs That Are Often Overlooked
- Ventilation and fume extraction for cutting and hot-mounting workstations, especially when processing polymers or composite materials.
- Sample storage and archiving: labeled sample racks, storage cabinets, and digital image management software.
- Periodic calibration of hardness testers and measuring microscopes, required to maintain ISO 17025 or other accreditation.
- Preventive maintenance and spare consumables: plan for 2 - 4% of equipment value per year.
- Operator training: the quality of a metallographic result depends heavily on technique. Budget for initial training and periodic refresher sessions.
Smart Selection Criteria for Long-Term Performance
Buying equipment for a new laboratory is a balancing act between immediate testing needs, future growth, and capital constraints. Use the following criteria to evaluate each procurement decision.
Match equipment capacity to sample throughput
If the laboratory will process fewer than 20 samples per day, manual machines are adequate and economically justified. Above this level, automatic or semi-automatic cutting, mounting, and polishing systems reduce operator fatigue and improve reproducibility.
Check compliance with applicable testing standards
Ensure your equipment and consumables support the test methods defined by your quality system, such as ASTM E3 for metallographic sample preparation, ISO 6507 for Vickers hardness testing, or ISO 4499 for hardmetals. Calibration certificates and traceability documentation should be requested during procurement.
Prefer a supplier that covers the full metallographic workflow
Working with one supplier for cutting machines, mounting systems, grinding and polishing consumables, microscopes, and hardness testers simplifies installation, training, spare parts, and warranty management. Hangzhou Jingjing Testing Instrument Co., Ltd. is positioned as a comprehensive manufacturer and distributor in this field, combining self-developed hardness testers and metallographic microscopes with internationally sourced inspection equipment, so you can build an entire laboratory from a single qualified source.
Frequently Asked Questions
Q1: What is the minimum equipment needed to start a metallographic testing lab?
At minimum you need a cutting machine or abrasive cutter, a grinding and polishing machine, a metallographic microscope, and a hardness tester if hardness verification is part of your scope. Basic consumables including cutting discs, abrasive paper, polishing cloths, and polishing suspension must be included in the starting budget.
Q2: How much does it cost to set up a metallographic testing laboratory?
A basic metallographic laboratory with manual equipment can be set up for approximately USD 30,000 to USD 50,000. A mid-range lab with automatic preparation and a digital microscope costs between USD 60,000 and USD 100,000. A research-level laboratory with automated preparation lines and advanced microscopy may exceed USD 150,000.
Q3: Should I choose an inverted or an upright metallographic microscope?
Choose an inverted microscope for general metallurgical analysis, because samples are placed face-down on the stage and no additional leveling is needed. Choose an upright microscope if you work with thin sections, flat-mounted samples, or need transmitted-light accessories for special applications.
Q4: How long does metallographic sample preparation take?
With automatic equipment, a single sample can be cut, mounted, ground, and polished in 20 to 40 minutes. Manual preparation typically takes longer and is more dependent on operator skill. Rushing the preparation process almost always degrades image quality, so realistic scheduling is recommended.
Setting up a metallographic testing lab is a project that touches production quality, product certification, and long-term research capabilities. A disciplined approach to the equipment checklist and budget planning will prevent unpleasant surprises after installation and keep the laboratory productive from the first day of operation.
As a comprehensive supplier of metallographic consumables, sample preparation equipment, metallographic microscopes, and hardness testers, Hangzhou Jingjing Testing Instrument Co., Ltd. can support each stage of your laboratory project. Review the full range of equipment options on the official website, or contact the application engineers for an equipment configuration proposal tailored to your materials and budget.

