

 English
  Español
  Deutsch

Metallographic Sample Preparation
Content
- 1 Grinding, Polishing, Mounting, and Precision Cutting Equipment for Metallographic Analysis
- 2 The Metallographic Sample Preparation Workflow
- 3 Precision Cutting Machines and Automatic Abrasive Cutters
- 4 Mounting Presses and Mounting in Metallography
- 5 Grinding Polishing Machines and Automatic Polishing Systems
- 6
- 7 Choosing Sample Preparation Instruments and Consumables
Grinding, Polishing, Mounting, and Precision Cutting Equipment for Metallographic Analysis
Producing a reliable metallographic sample depends on four linked steps — cutting, mounting, grinding, and polishing — and the equipment chosen at each stage determines whether the final surface is flat, scratch-free, and representative of the material's true microstructure.
The Metallographic Sample Preparation Workflow
Each stage in sample preparation removes damage introduced by the previous one. Skipping or rushing any step usually shows up later as smearing, relief, or pull-out under the microscope, so the equipment at each stage needs to match the material's hardness and the required inspection standard.
Precision Cutting
An automatic abrasive cutting machine sections the sample with minimal heat and deformation, preserving the microstructure near the cut edge.
Mounting
A metallurgical sample mounting press embeds the specimen in resin, giving it a uniform shape for consistent handling during grinding and polishing.
Grinding
Successive abrasive grits remove the cutting damage layer and flatten the surface before finer polishing steps begin.
Polishing
An automatic polishing system brings the surface to a mirror finish suitable for etching and microscopic examination.
Precision Cutting Machines and Automatic Abrasive Cutters
A high precision cutting machine controls feed rate, blade speed, and coolant flow together, which keeps cutting temperature low enough to avoid altering the microstructure at the cut face. This matters most for heat-sensitive materials such as hardened steels, where excess heat can cause localized tempering that skews hardness readings taken later.
Automatic abrasive cutting machines add programmable cut sequences and automatic downfeed, which improves repeatability across large sample batches and reduces the operator skill needed to get a clean, low-deformation cut. Key selection factors include:
- Blade diameter and cutting capacity — determines the maximum sample cross-section the machine can handle in a single pass
- Feed rate control — programmable feed rates reduce burning and edge rounding on harder alloys
- Coolant delivery — consistent coolant flow across the full cut prevents localized overheating
- Vise and clamping design — secure clamping avoids sample shift, which is a common cause of angled or uneven cuts
Mounting Presses and Mounting in Metallography
Mounting in metallography serves two purposes: it gives irregularly shaped or small samples a standard geometry, and it protects fragile edges during grinding and polishing. A metallurgical sample mounting press applies heat and pressure to compress resin around the specimen, producing a solid puck ready for automated handling.
| Mounting Method | Cycle Time | Best Suited For |
|---|---|---|
| Hot compression mounting | 6–10 minutes | Routine samples tolerant of heat and pressure |
| Cold mounting (castable resin) | 15–30 minutes cure | Heat-sensitive, porous, or coated samples |
| Vacuum impregnation | 20–40 minutes | Porous materials needing full resin penetration |
Common mounting approaches used ahead of grinding and polishing
Grinding Polishing Machines and Automatic Polishing Systems
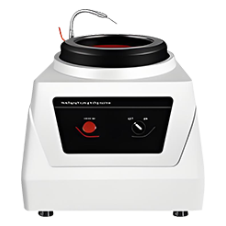
A metallographic grinding and polishing machine moves the sample through successive abrasive stages, typically starting around 120–240 grit and stepping down to 1 micron or finer, with platen speed and applied force adjusted at each stage. Manual grinding polishing machines suit low sample volumes, while automatic polishing systems hold force, speed, and cycle time constant across every sample, which is the main reason labs upgrade once throughput or reproducibility becomes a concern.
Single-sample manual units
Cost-effective for R&D labs and low sample volumes where an operator adjusts pressure by hand.
Multi-sample automatic heads
Hold several mounted samples under uniform force, suited to QC labs running repeat batches on similar materials.
Central force / individual force systems
Apply force to each sample independently, which matters when mixing materials of different hardness in one run.
Choosing Sample Preparation Instruments and Consumables
Sample preparation instruments and sample preparation consumables need to be matched as a system rather than selected separately. Abrasive discs, polishing cloths, and diamond suspensions are formulated for specific platen speeds and pressures, so mismatched consumables are a common cause of inconsistent results even when the equipment itself is functioning correctly.
- Abrasive papers/discs — grit sequence should match the hardness and heat sensitivity of the material being prepared
- Polishing cloths — napless cloths suit final fine polishing; napped cloths suit intermediate diamond polishing stages
- Diamond suspensions and lubricants — particle size and lubricant chemistry affect both cutting rate and surface finish quality
- Etchants — selected based on the alloy system, applied after polishing to reveal grain structure under the microscope
Tracking consumable usage against sample throughput helps labs standardize preparation time per sample and catch drift in surface quality before it affects reported results.

